Vermiculture n. / The keeping of worms. A worm farm.
What I like to refer to as a vermihut, is also known as a vertical migrating worm bin. This is a multilayer bin that holds your worms and they eat their way upward creating rich compost.
On our farm there are many things we need rich organic material for since we’re trying to grow food, in the form of plants, shrubs, and trees. There is often a need for some rich potting organic matter to liven up some plants.
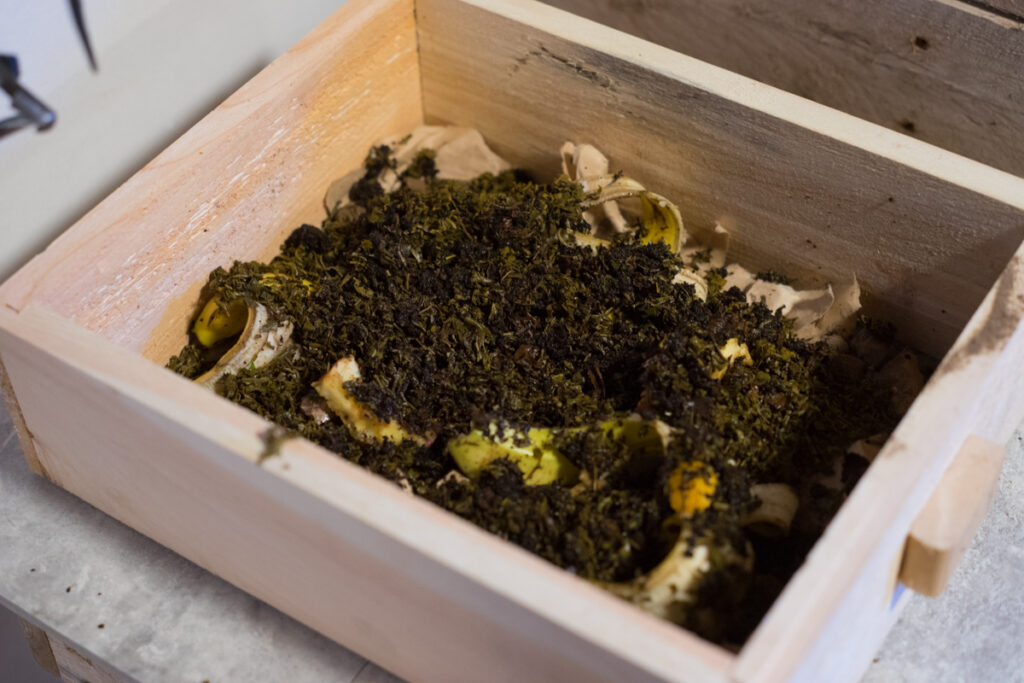
Vermiculture is worm farming, I do that so I can harvest their castings. It’s basically gold for gardeners. Worms eat compost material and turn it into nutrient rich vermicompost. All of your kitchen scraps including banana peels, potato bits, carrot peelings, all of these things are food for your worms.
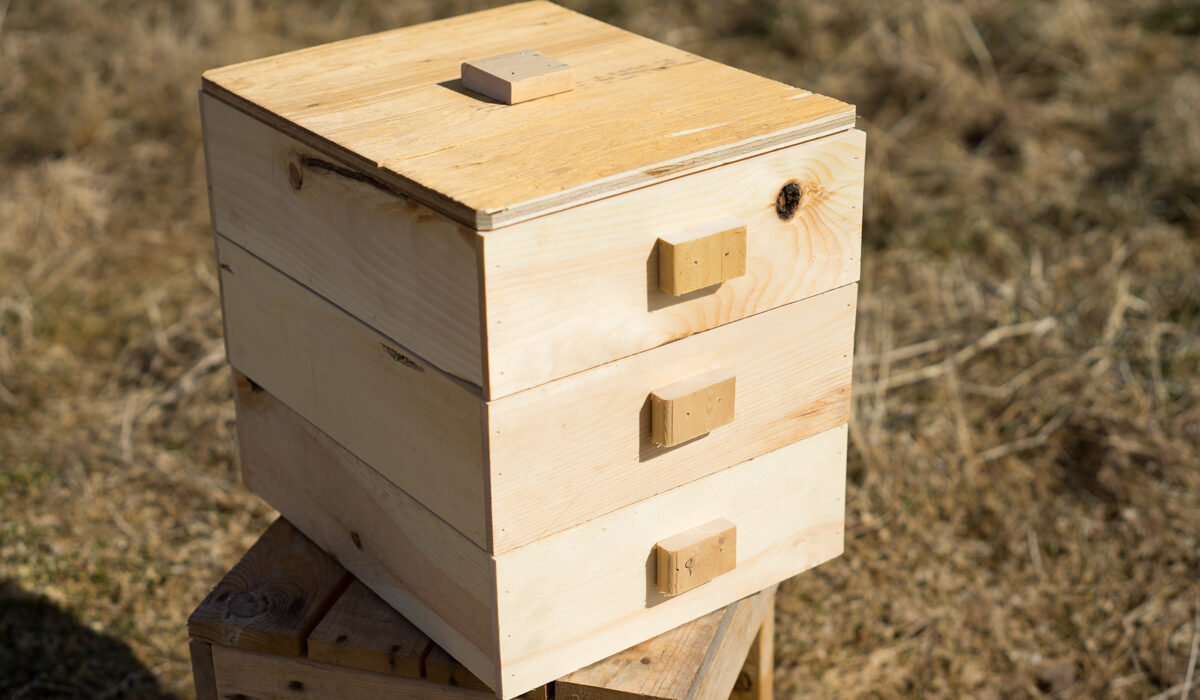
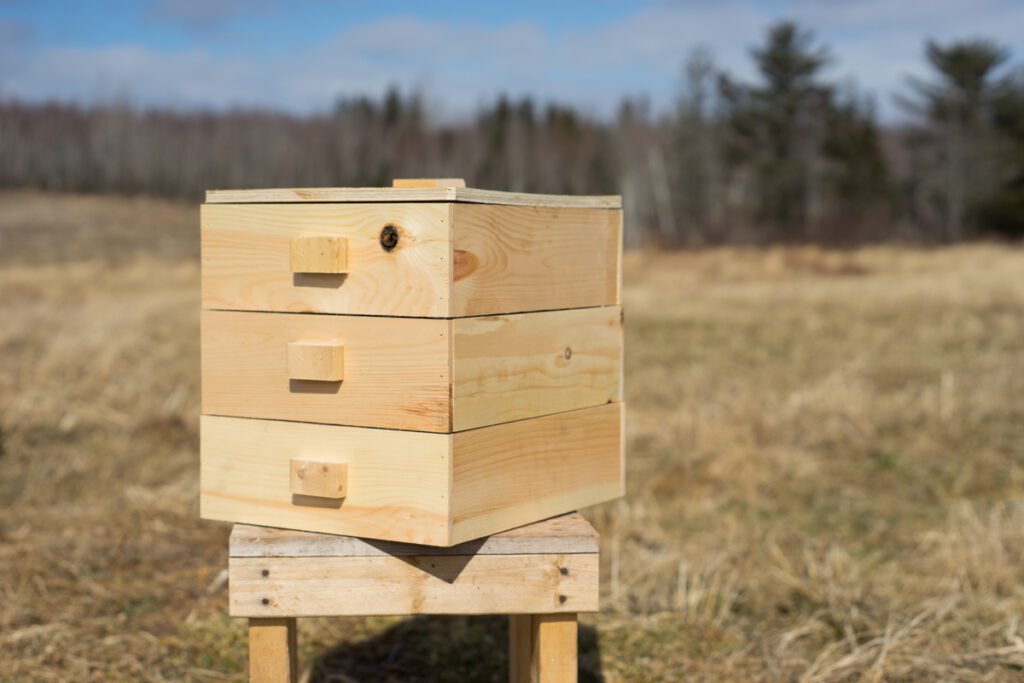
Here at Red Spruce Farm, we like to work with wood. Above you will see some fresh looking Vermi bins that together make up a vermihut.
Building the Vermihut
I make my bins a little fancy because seeing nice(r) joints makes me happy, but you could make them with a butt joint or even get real fancy and make them with a dovetail, that’s your choice.
I also like to make my bins rectangular, not square, so I make two of the sides a little smaller than the other sides.
The sizes I use are 12″ on the short side, and 14″ on the long side; to make one bin, this means you’d need 52″ of board. I choose whichever spare wood I have laying around at 3/4″ thickness. As far as depth goes, I’d suggest something in the range of 2″ to 4″.
For the top, depending on the type of joint used, a piece of plywood is usually the best because it’s capable of being quite wide and one uniform piece. For my lap jointed bins (lap joints are each 3/8 deep), I cut it to 12″ x 14 3/4″ to fit onto the top.
I use little scraps of wood for the handles you see, but they’re not even needed. They are convenient.
I nail it all together with a brad nailer, which carries finishing nails, but you could use screws just as well. Hammering nails in might get tricky without a jig.
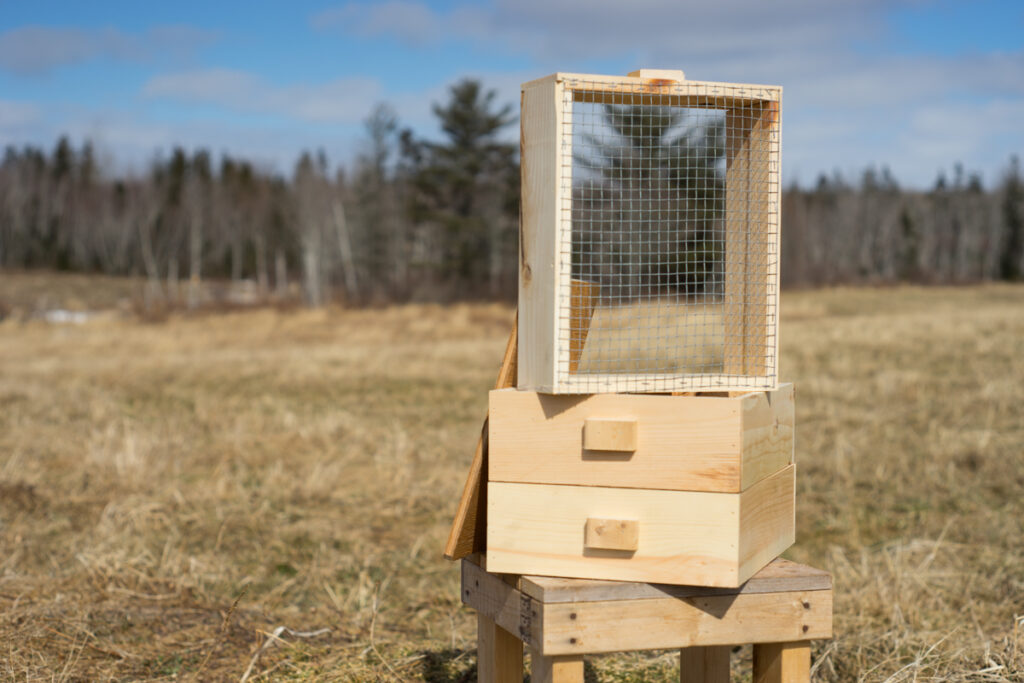
Once you have the frame of the bin done, add some wire mesh to the bottom. I like 1/4″ mesh as it allows the worms to crawl through easily, and the compost stays in without any issues. I cut the mesh to size using wire cutters (I find wire cutters make a closer cut so that little daggers of the cut wire mesh aren’t sticking out ready to attack me). Then I use an upholstery stapler to tack on the wire mesh. I use a lot of staples cause that thing ain’t ever coming off and it holds a lot of the weight of the vermicompost.
If you’re a family/farm that has a lot of food scraps leftover at the end of the day, then maybe you should go on the deeper side of things and get those worms working like mad. If you’re just a single person eating alone mostly, then maybe go on the shallower side of the depth scale so that you don’t have to wait half a year before you can start harvesting your castings!
Feeding the worms in the Vermihuts
Worms like compost. Just feed it to them and they’ll be happy.
Here’s a short list of what I usually feed them:
- vegetable peels and scraps
- scraps of greens
- fruits (avoid citrus)
- egg shells
- used tea and coffee
- cow manure!
Here’s a short list of what I avoid:
- meats and their byproducts
- dairy products
- wheat products
- sugary things
- high citrus (lemons, orange)
- onions, garlic
- spicey things
- chemicals and pesticides
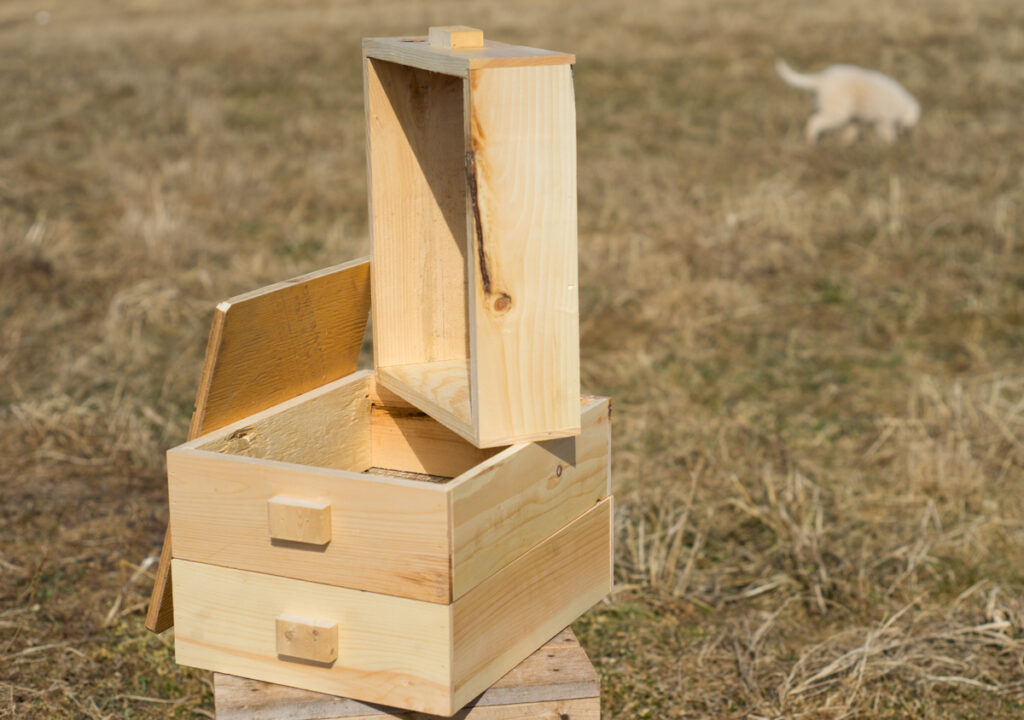
How Do Vermihuts Work
The stacking of the vermibins makes the vermihut. The way it works is you start with one and keep feeding the worms in the bin until it’s full, then you put the next bin on top of that (second bin), and keep feeding it until it’s full, then you put the next bin on top of that (third bin) and keep feeding it until it’s full, and it’s at this point, you take the bottom bin, empty it of all it’s castings, and put it at the top of the hut, and start filling it with compost again!
Take the bottom one, empty it and move it to the top. Repeat.
Now you’ve got the gold (aka. vermicompost). You’ll be surprised at how much you can actually get from the bins! And if you find a worm in the castings you’ve just taken from the bottom or little bits that didn’t get fully eaten, then just put it back into the top and see it work again!
Never ending cycle, so long as you keep feeding it.
Starting The Vermiculture Vermihut
So, you’re ready to start now. Wait, where are the worms?
Ideally, you have a nice friend, like I did, that says to you: “Oh hey! I just started a vermihut and my worms are doing great. You should see them go. Would you like some to get you started.”
I’m sure there’s a garden store or homesteading store out there somewhere selling the worms too.
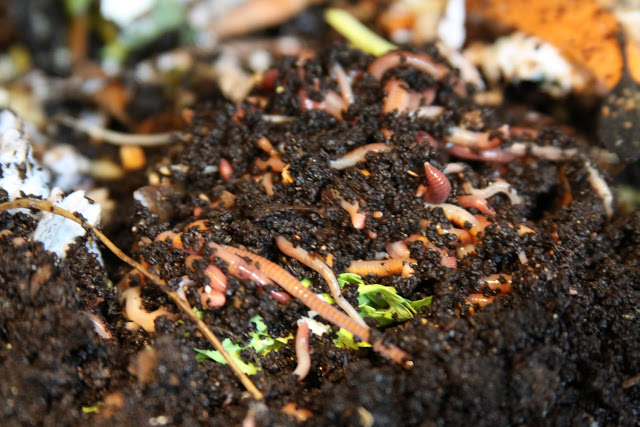
I wonder if anybody has tried to use the regular garden earthworms to start their vermihut ? Perhaps that would work too!
The census is that red worms and European night worms work the best though, as pictured above (red worms).
How to Avoid Flies and Mold in the Vermihut
Worms have no teeth, so they like eating slightly decomposed material, so it’s kind of hard to avoid all mold. However, there’s a few things you can do to keep it down.
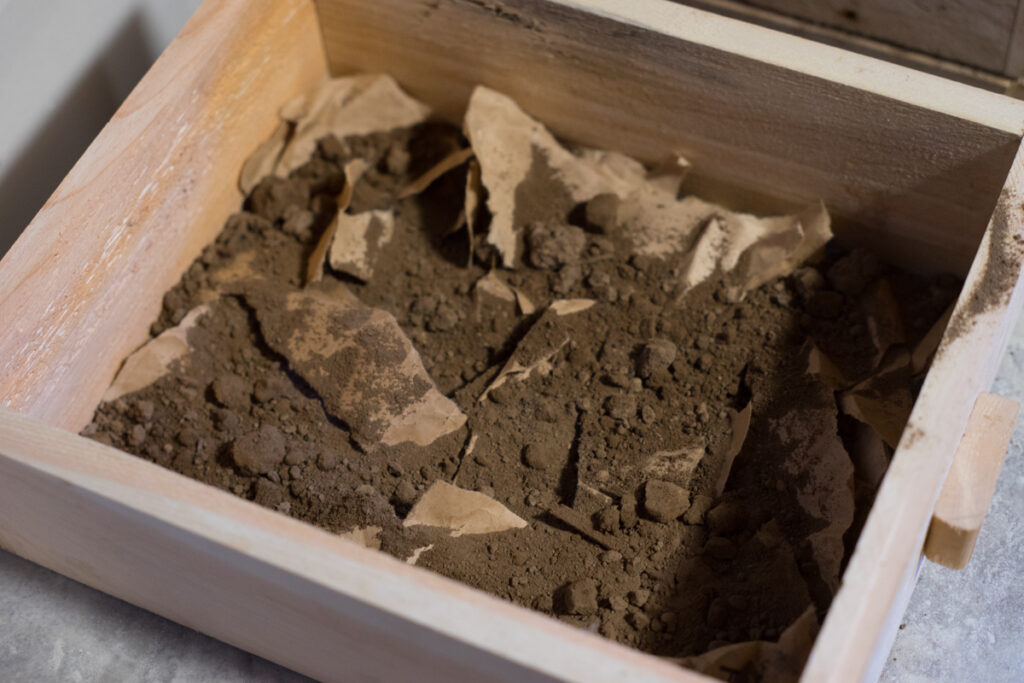
To make the vermihut pleasant to keep indoors, I like to put a little dirt in there and a little bit of shredded paper. This helps smother the compost which I feel helps avoid fruit flies. So, when I add a load of compost, I have a bucket of dirt from outside there waiting for me to sprinkle on top. If I open up the bin to have a little peak and see some mold growing, I throw in a little dirt and that solves the problem. If I don’t have dirt, I just rip up some newspaper and throw it on top.
An ideal ratio of Carbon-to-Nitrogen is somewhere around 25:1. Carbon is the brown stuff like paper or leaves, the nitrogen is the green stuff, which is fresh food scraps. However, not all food is either one or the other. Food scraps are about 15:1, and garden waste is more like 25:1, so if you add this stuff and a bit of paper and dirt as I do, the ratio should be just about balanced. Without this balance, things can get inhospitable for your worms.
I’ll usually put shredded paper at the bottom when I’m starting off a new bin so that when I take off the vermibins to harvest the castings, the gold doesn’t fall out the bottom. That’s my theory anyway. It also keeps the rotting fresh food from exposure to flies, etc.
I don’t like to stuff the bin completely full with food scraps and then hope that the worms make it through super quick before mold starts to grow like mad. I feel this kind of overwhelms them a little bit. So, I try to gauge how much they need and how often to feed it to them so that I am feeding them once or twice a week. When I remove the lid and see about 75% of the scraps gone, I feed them a bit more.
I set mine in the basement and just sprinkle a little bit of water over their food when I’m feeling it’s a little dry,
As a quick guide, the worms will usually double in population under optimal conditions and food in 60-90 days, and they eat about half their body weight each day.
Discussion Over Tea
People say that vertical migration vermiculture bins – or as we’ve come to know them, vermihuts, makes great compost tea. I will try this this summer to fertilize my tomatoes that love a nitrogen rich tea.
The use of wood for the vermihut constructin comes into this conversation too. I’m sure there’s controversy over using wood, on account of decaying the wood. This may happen in the long long term, but I would way rather have my wood decaying into organic matter and/or eaten by the worms turning it into castings, than to have a big plastic vermihut (UNLESS, and this is a big unless, I was able to upcycle an old plastic bin of some sort into a vermibin – my friend who got me into this had a plastic bin, which really inspired me to make my own bin and she had bought hers second hand from another friend, which I guess is upcycling too). Anyway, for me, less plastic is better even if it means in 10 years I have to make a new bin because the worms were working so good. Here on the farm we always try to search for a plastic free life, and if we do have plastic we try to reuse it or up-cycle it.
Red Spruce Farm Sells Vermihuts
Red Spruce Farm does sell these wooden vermihuts for your wormy goodness.
Resources
- Youtube video with Farmer Rishi | building a wooden vermihut, or as he calls them, vertical migration worm bin
- Worm Farm Guru | good list of foods for worms and their ratios

Sona Weber
Hi Ned, I received my Vermihut 🙂 Thank you! I’m excited to learn how to raise worms and have them make rich compost & worm casting amendment for my garden. The 3 worm bins are not long enough to rest on the included wood blocks so the tray can easily slide out. They end up sitting directly on the tray. I’m planning to add a couple of pieces of wood connecting the 2 blocks so that the bins can rest on those and allow the tray to slide out. I wanted to let you know so you can make the bins a little longer for that sized tray.
Sincerely,
Sona
Ned
Thanks for the feedback Sona, though I’m a little bit confused about what you’re saying. It makes me think that perhaps you have the tray sideways? A picture would help me understand!
Regards,
Ned